It was a rainy Saturday afternoon when Jessica found herself staring at her outdated kitchen cabinets. The once bright oak finish had faded over the years, and the dark wood now made her small kitchen feel even smaller. She loved cooking, but every time she walked into the kitchen, she felt uninspired by the dated look. “I just need something fresh,” she thought. After researching remodelling options, Jessica quickly realized that replacing the cabinets would cost thousands of dollars—money she didn’t want to spend. That’s when she stumbled upon the idea of painting her cabinets. “How hard could it be?” she mused. Armed with paint brushes, primer, and a can-do attitude, Jessica embarked on a DIY project that would transform her kitchen from drab to fab without breaking the bank.
Jessica’s story is familiar to many homeowners who dream of updating their kitchens but shy away from the high cost of a full remodel. Painting kitchen cabinets is one of the most cost-effective ways to give your kitchen a makeover, and with a little time, patience, and the right tools, you can completely change the look and feel of your space. In this article, we’ll walk you through the process of painting kitchen cabinets, provide helpful tips, and offer data on why this project is a popular choice for homeowners looking to update their kitchens.
Why Painting Kitchen Cabinets is a Smart Investment
For homeowners like Jessica, painting kitchen cabinets offers a budget-friendly alternative to replacing them entirely. The cost of replacing kitchen cabinets can range anywhere from $5,000 to $25,000 or more, depending on the size of your kitchen, the materials used, and whether you opt for custom cabinets. In contrast, painting your cabinets can cost as little as $200 to $600 for materials and supplies, depending on the quality of paint and primer you choose.
1.1. Return on Investment
Not only is painting your cabinets significantly cheaper, but it also provides a solid return on investment (ROI). According to a survey by HomeLight, a kitchen facelift that includes repainting cabinets can provide an ROI of up to 72%. (Source: HomeLight, “Top Kitchen Renovation Trends,” 2022)
Additionally, if you’re considering selling your home, a fresh coat of paint on the cabinets can make a big difference in how potential buyers perceive your kitchen. Bright, neutral cabinet colours can make the space feel bigger and more modern, making your home more attractive on the market.
1.2. Popularity of DIY Kitchen Cabinet Painting
DIY home improvements have surged in popularity, especially during the pandemic, as people spend more time at home. According to Houzz, 27% of homeowners have embarked on a DIY home improvement project over the last two years, and painting kitchen cabinets remains one of the top projects. (Source: Houzz, “2022 Home Renovation Trends,” 2022)
The Tools and Materials You’ll Need
Before you dive into painting your kitchen cabinets, it’s important to gather all the necessary tools and materials. Preparation is key to achieving professional-looking results. Here’s a basic list to get you started:
- Paint: For kitchen cabinets, use a high-quality paint designed for cabinetry. Satin, semi-gloss, or high-gloss finishes work best because they provide durability and are easy to clean.
- Primer: A good primer is essential for ensuring that the paint adheres properly to the cabinet surface. A stain-blocking primer is ideal if your cabinets are made of wood that tends to bleed, like oak or cherry.
- Sandpaper: To ensure a smooth surface, you’ll need sandpaper or sanding blocks in varying grits (120 to 220) to sand the cabinets before and between coats of paint.
- Degreaser/Cleaner: Kitchens tend to accumulate grease, so cleaning your cabinets thoroughly before painting is crucial. Use a TSP (trisodium phosphate) cleaner or a degreaser specifically made for kitchens.
- Paint brushes and rollers: Use high-quality brushes with synthetic bristles and foam rollers for a smooth finish.
- Painter’s tape: Painter’s tape is needed to protect areas around the cabinets (like walls, countertops, and floors).
- Drop cloths: Protect your floors and countertops from drips and spills with drop cloths or old sheets.
- Step-by-Step Guide to Painting Your Kitchen Cabinets
Now that you have your tools and materials let’s walk through the process step by step.
Step 1: Remove the Cabinet Doors and Hardware
Begin by removing all the cabinet doors, drawers, and hardware. Label each door and its corresponding hinge to make reinstallation easier. This is also a good time to replace any old or outdated hardware with new handles or knobs, which can further update the look of your kitchen.
Step 2: Clean the Cabinets Thoroughly
Using a degreaser, thoroughly clean all cabinet surfaces. Grease and grime buildup will prevent the paint from adhering properly, so be sure to wipe down the fronts and backs of the doors and the cabinet frames.
Step 3: Sand the Surfaces
Once the cabinets are clean and dry, sand them using medium-grit sandpaper (120 to 150). The goal is to scuff the surface slightly so that the primer adheres better. For smooth, factory-finished cabinets, a light sanding with 220-grit paper is sufficient. Wipe away dust with a damp cloth.
Step 4: Apply Primer
Apply a coat of stain-blocking primer to all the surfaces. Primer helps the paint stick and ensures a smooth finish. If your cabinets are dark or have knots, you may need two coats of primer. Allow the primer to dry completely before proceeding.
Step 5: Sand Between Coats
After the primer has dried, lightly sand the cabinets again using fine sandpaper (220 grit). This helps to smooth out any imperfections. Wipe away the dust before applying paint.
Step 6: Paint the Cabinets
Apply the first coat of paint using a combination of a brush for detailed areas (like corners) and a foam roller for flat surfaces. Depending on the type of paint and the colour of your cabinets, you may need two to three coats. Allow each coat to dry thoroughly before applying the next. Sand lightly between coats for an even finish.
Step 7: Reattach the Doors and Hardware
Once the final coat of paint has dried, carefully reattach the cabinet doors and hardware. If you’ve chosen to update the hardware, this is the perfect time to install the new knobs or handles.
Popular Paint Colors for Kitchen Cabinets
When selecting a colour for your kitchen cabinets, consider the overall style and feel of your kitchen. Neutral colours are the most popular because they create a timeless look and can help brighten up the space.
4.1. White and Off-White
White remains the most popular colour for kitchen cabinets, and for a good reason. It creates a clean, fresh look and can make a small kitchen feel more open and airy. According to a survey by Houzz, 41% of homeowners chose white when painting their kitchen cabinets, making it the most popular choice. (Source: Houzz, “2022 Kitchen Trends Study,” 2022)
4.2. Gray and Greige
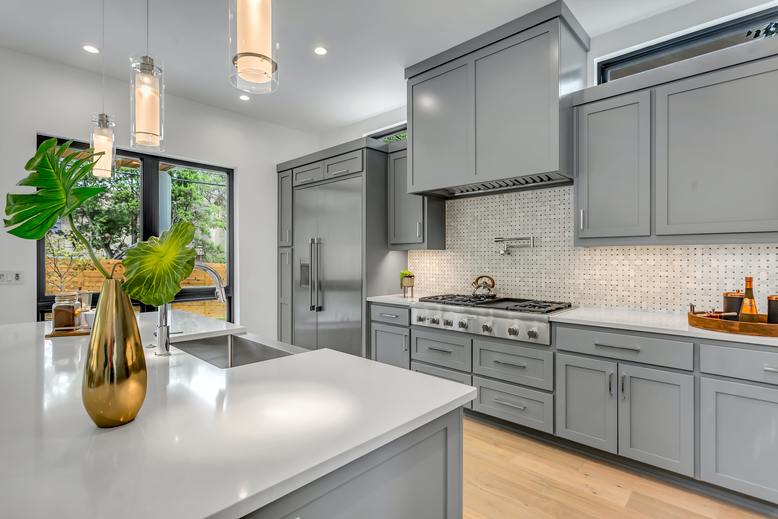
For those looking for something a bit different but still neutral, grey or greige (a mix of grey and beige) is a popular option. These shades offer a more modern feel while still being versatile enough to work with a variety of styles.
4.3. Bold Colors
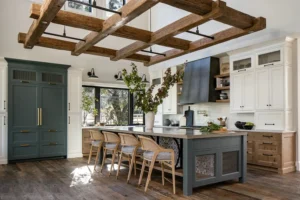
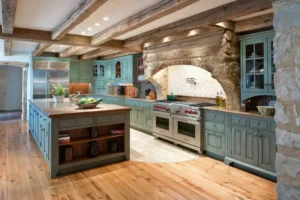
If you want to make a statement, consider painting your cabinets a bold colour like navy blue, forest green, or even matte black. While bold colours may not be for everyone, they are becoming more popular in contemporary kitchen designs. In fact, 10% of homeowners opted for blue cabinets in their kitchen, according to the same Houzz survey. (Source: Houzz, “2022 Kitchen Trends Study,” 2022)
Tips for Success and Common Mistakes to Avoid
Painting kitchen cabinets is a big job, but with the right approach, you can achieve a professional-looking result. Here are a few tips to keep in mind:
- Take your time: This is not a weekend project. Give yourself plenty of time to properly prep, paint, and dry the cabinets.
- Don’t skip the primer: Primer is essential for ensuring that your paint adheres well and lasts.
- Use high-quality paint: Cheap paint won’t hold up to the wear and tear that kitchen cabinets endure, so invest in high-quality, durable paint designed for cabinetry.
- Be patient with drying times: Allow each coat of primer and paint to dry fully before moving on to the next. Rushing the process can lead to a messy or uneven finish.
Conclusion:
A Kitchen Transformation on a Budget
For homeowners like Jessica, painting kitchen cabinets offers an affordable and effective way to breathe new life into a dated kitchen. With the right tools, patience, and a little elbow grease, you can transform your space without the high costs of a full renovation. Whether you opt for classic white, sleek grey, or a bold pop of colour, painted cabinets can make your kitchen feel brand new.
With DIY home projects becoming more popular than ever, painting your kitchen cabinets is a smart investment that enhances your home’s aesthetic appeal and can increase its value. So, if you’re dreaming of a kitchen makeover, grab your paintbrushes and start your transformation today.

